Throttle & Kick-Down Linkage Options for the Slant Six with a Special Intake Manifold
(Click on any photos for a full size view)
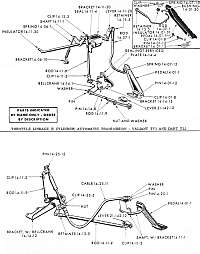 The SL6 cars came with 2 very different throttle linkage systems. 60 - 67 1bbls used a mechanical "rod type" linkage and 68 forward used a cable linkage. Both types used mechanical "kick-down" linkage on cars equipped with an automatic transmission. (controls transmission throttle pressure) Note that cable linkage was offered on the earler 64-66 V8, A-Body cars and also on SL6 cars equipped with Air Conditioning so keep your eye out for those set-ups, they are nice to have for an early car conversion and hard to find these days. Here is a look at the two main types of factory linkage systems. (We will keep referring back to this drawing so you may want to keep it "linked" to you "back button")
There is special factory linkage for the "Super Six" 2 barrel set-up so if you are planning to do a 2 bbl conversion, try hard to get all the special linkage parts that it came with. There is no way to make any of the 1 bbl linkage work with the Super Six set-up. Also note that the Super Six linkage is great as a "starting point" for an aftermarket 4 bbl set-up, with the carb. mounted in a "front to back" oreantation. Bottomline, Super Six linkage is worth picking-up if you see it for cheap.
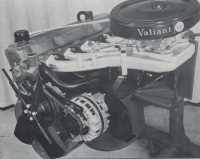 The real reason for this article is to show owners how to set-up the Hyper-Pak manifold with linkage. Note that the factory only had a "rod type" linkage at the time and that the Hyper-Pak was a "dealer installed"option , it is unclear if they ever had a automatic trans. kick-down linkage set-up worked-out.
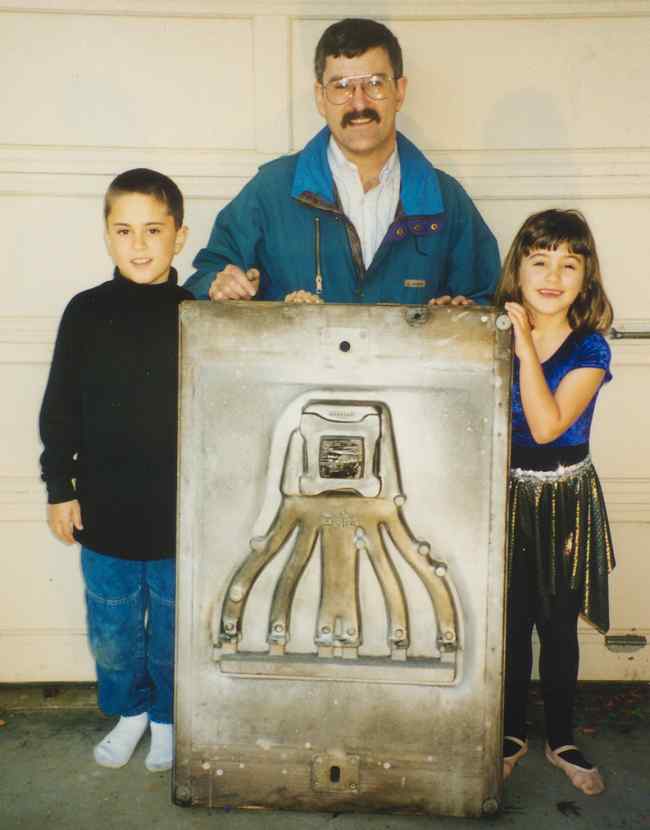
 I made it a point to "engineer-in" the cable type and kickdown linkages when I designed and reproduced the Hyper-Pak casting back in 1994. I have added additional casting bosses to the reproduction unit to help with mounting the special brackets needed to support cable type linkage and kick-down. As far as I know,
 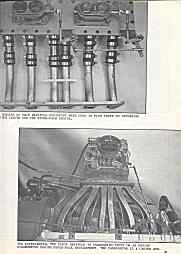 Clifford has kept these extra bosses in place as they continue to produce casting off the patterns I built. (these "extra" bosses may need drilling and taping)
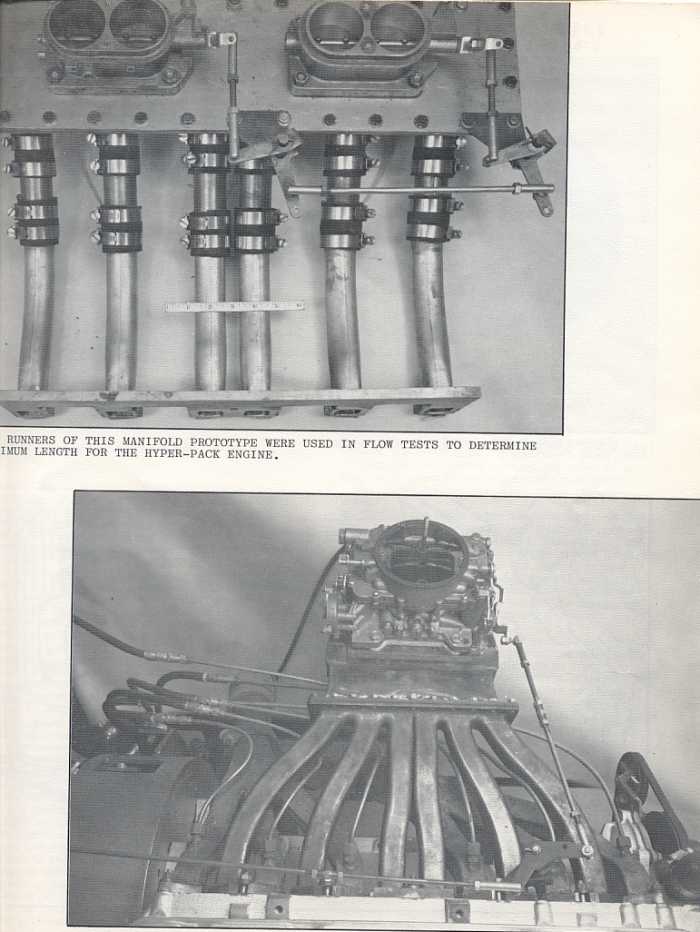
Here is a look at some of the origional linkage used on the Hyper-Pak and for some of the development prototype units. One key thing to note is the use of "bellcranks" or "turnbuckles", more on that in a moment. Note that the factory Hyper-Pak has the carb mounted "sideways", an after-market manifold has an enlarged carb. mounting flange to allow carb. mounting and linkage placement to support "sideways" or "front-to-back" carb. mounting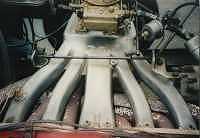 oreantation. If you have a origional Hyper-Pak unit, you will be limited to the sideways mounting and the carb. linkage shown.
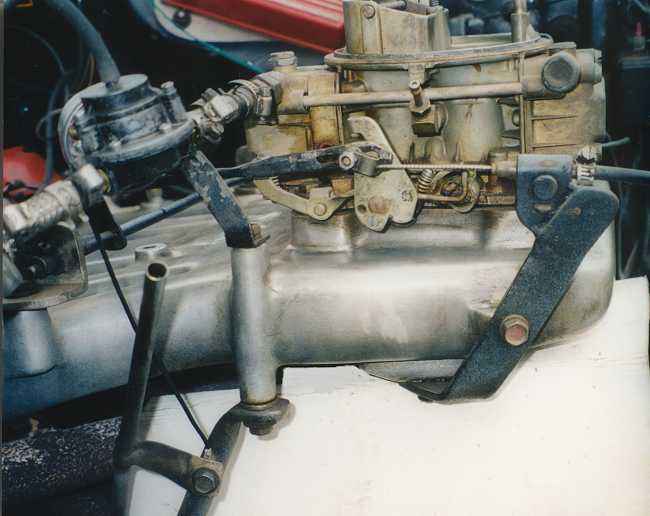
The linkage shown here is for a cable activated 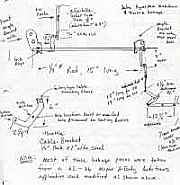 "sideways" carb. mounting system. One problem to overcome is finding a longer throttle cable. A good source for a longer cable is a front wheel drive "sideways" engine Mopar. There are many others to choose from at the yards. The one I have is about 3 feet long. (longer is good) I had to make-up a number of special linkage pieces and
 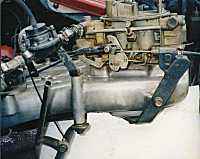 brackets so be forwarned, welding is required.
The frist step is to get the trottlle linkage in place. You must decide on your carb. oreantation and get it mounted. Make-up a bracket as shown, using a factory "screw-down" cable holder, welded onto a piece of band iron. Next make a return spring bracket, there are a couple of bosses available for mounting this easy to build piece. If you are running a manual transmission, you are now done, that's right, let's go for a drive! If you have a automatic, needing throttle pressure, we still have lot's of work to do.
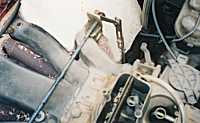 OK, work from the middle,out. We need to make a cross-shaft and two support brackets. I actually used the main piece of the factory 1 bbl shaft (14-11-1) linkage for this. It has a lever (14-11-28) already installed on one end. Make two end support brackets from angle aluminum stock. I had to move the second lever forward on the shaft, you can have it clamp with a bolt or weld it into place. ( don't weld it solid untill you get everything made-up and correctly positioned).
You can use many of the early "rod type" linkage pieces, rod (14-11-9) was moved to the rear lever and dropped down to a "pivot-pin" welded to the lower bellhousing support bracket. This pin supports bellcrank (14-14-1) or you can mount the entire bellcrank / plate assy (14-14-4) low on the firewall to act as the pivot point. The last piece of linkage is rod 14-11-9 (the lower two piece one with the same number?!?) I had to lengthen these rods and did it in a way that kept their length adjusters in-tacked. Make all your linkage pieces with means of adjustment, you will need adjustment to fine-tune the system.
At one end we have the tranny throttle pressure lever, note that there are different lever lengths available to help "tune" your over-all linkage "travel". At the carb., there is an adjustable rod with a short slot, here again, this allow for some adjustment and throttle movement,with-out boosting the trans. pressure for those late, neck snaping shifts.
Well look at the photos for the pieces, I have some additional pics I need to find (Super Six shots) so I hope to do more on this article later.
 The SL6 cars came with 2 very different throttle linkage systems. 60 - 67 1bbls used a mechanical "rod type" linkage and 68 forward used a cable linkage. Both types used mechanical "kick-down" linkage on cars equipped with an automatic transmission. (controls transmission throttle pressure) Note that cable linkage was offered on the earler 64-66 V8, A-Body cars and also on SL6 cars equipped with Air Conditioning so keep your eye out for those set-ups, they are nice to have for an early car conversion and hard to find these days. Here is a look at the two main types of factory linkage systems. (We will keep referring back to this drawing so you may want to keep it "linked" to you "back button")